In an era dominated by home automation, the humble garden hose and traditional mechanical irrigation clocks are rapidly becoming relics of the past. As homeowners seek ways to reduce utility bills, conserve precious natural resources, and maintain pristine landscapes, smart sprinkler timers have emerged as a definitive solution. These intelligent devices replace the rigid, “set-it-and-forget-it” schedules of old controllers with dynamic, data-driven irrigation cycles that adapt in real-time to environmental conditions.
Transitioning to a smart irrigation system can feel daunting. From understanding complex wiring schemes to navigating algorithmic scheduling models, there is a learning curve involved. This comprehensive guide will explore everything you need to know about selecting, installing, configuring, and maximizing the efficiency of a smart sprinkler timer.
1. Understanding the Core Technology
Traditional sprinkler timers run on a simple internal clock. If you program them to water every Tuesday and Thursday at 6:00 AM, they will do so flawlessly, even if a torrential downpour is occurring simultaneously. Smart sprinkler timers eliminate this waste by acting as mini-computers connected to the internet.
Weather Intelligence and Predictive Watering
The primary feature that sets smart controllers apart is their integration with local weather networks. By connecting to your home Wi-Fi, these devices monitor real-time weather forecasts, historical data, and live satellite feeds. If the system detects a high probability of rain, freezing temperatures, or high winds, it automatically skips or delays the scheduled watering cycle.
Evapotranspiration (ET) Modeling
Advanced smart controllers use a scientific metric known as Evapotranspiration (ET) to determine exactly how much water your soil requires. ET represents the combination of water lost through evaporation from the soil surface and water lost via transpiration through the plant’s leaves. Factors influencing ET include:
- Solar radiation and sunlight intensity
- Ambient temperature
- Relative humidity
- Wind speed
By calculating daily ET rates, a smart controller replaces only the water that has actually been lost, keeping soil moisture at an optimal level for plant health without oversaturating the roots.
2. Choosing the Right Smart Sprinkler Timer
Before purchasing a controller, you must assess your property’s specific needs and your current irrigation infrastructure.
Zone Capacity
Irrigation systems are divided into “zones,” where each zone represents a group of sprinklers controlled by a single valve. Count your existing zones before buying. Most smart timers come in standard configurations of 4, 8, 12, or 16 zones. It is always wise to buy a controller with slightly more capacity than you currently need to accommodate future landscape expansions.
Indoor vs. Outdoor Enclosures
Where is your current timer located? If it is inside a garage or basement, a standard indoor model is sufficient. If your controller is mounted on an exterior wall exposed to rain, dust, and extreme temperatures, you must purchase an outdoor-rated model or an optional weatherproof enclosure kit.
Ecosystem Compatibility
If you have already invested in a smart home platform, choose a controller that integrates seamlessly with your existing devices. Look for compatibility with platforms such as Apple Home, Google Home, Amazon Alexa, or Samsung SmartThings. This allows you to control your sprinklers using voice commands or tie irrigation routines into broader home automation scenes.
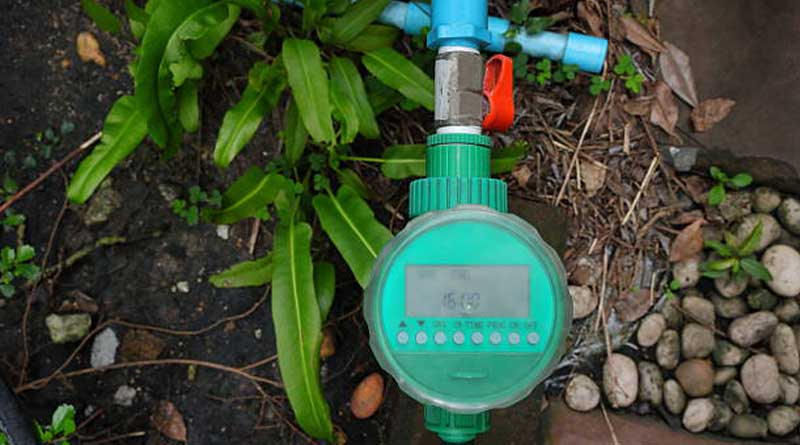
3. Step-by-Step Installation Guide
Replacing an old controller with a smart timer is a highly manageable DIY project that typically takes under an hour. No advanced electrical skills are required, as irrigation systems operate on safe, low-voltage (24V AC) power.
Step 1: Document Your Existing Wiring
Go to your old controller and remove the faceplate to expose the wiring terminal. Before disconnecting any wires, take a clear, high-resolution photograph with your smartphone. This photo will serve as your ultimate reference point during the installation process.
Step 2: Label and Disconnect the Wires
Most smart controllers include a sheet of pre-printed wire labels. Attach these labels to your existing wires based on the terminal slots they occupy. The most critical wires to identify are:
- Common Wire (C): This wire completes the electrical circuit for all your zone valves. There may be more than one Common wire.
- Zone Wires (Numbered 1, 2, 3, etc.): These individual wires run directly to the solenoid valve of each specific zone.
- Master Valve / Pump Start Relay (M or MV): Used if your system relies on a master valve to control water flow into the entire main line, or a pump to draw water from a well.
- Sensor Wires (S or SEN): If you have an existing hardwired rain sensor.
Once everything is clearly labeled, disconnect the power supply to the old timer and detach the wires from the terminal strip.
Step 3: Mount the New Smart Controller
Unscrew the old housing from the wall. Hold the new smart timer in position and mark the mounting holes. Use a level to ensure the device sits evenly. Drill the pilot holes, insert drywall anchors if necessary, and secure the new controller backplate to the wall using the provided screws.
Step 4: Reconnect the Wiring
Feed the wire bundle through the bottom or rear opening of the new controller housing. Insert each labeled wire into its corresponding terminal on the new unit. Most modern controllers utilize push-to-connect terminals, requiring you to simply push the bare copper wire into the slot until it clicks into place. Ensure no exposed copper strands from adjacent wires are touching one another, as this can cause a short circuit.
Step 5: Connect Power and Mount the Faceplate
Plug the new power adapter into a nearby wall outlet and connect the barrel jack to the controller. Snap the front faceplate or cover onto the unit. The device should power up, indicated by flashing LED lights or an on-screen prompt signaling it is ready for setup.
4. Software Configuration and Network Setup
The true power of your smart controller lies in its software. Follow these steps to link your device to the cloud and optimize its performance.
Downloading the App and Pairing
Download the manufacturer’s dedicated application from the iOS App Store or Google Play Store. Create an account, turn on your smartphone’s Bluetooth, and follow the in-app onboarding wizard. The app will prompt you to scan a QR code on the controller or enter a serial number to initiate the pairing process.
Wi-Fi Optimization
Smart controllers require a stable internet connection to fetch weather updates. Most models operate strictly on the 2.4 GHz Wi-Fi frequency band because it offers a broader coverage range and penetrates exterior walls better than 5 GHz networks. Ensure your phone is connected to your home’s 2.4 GHz band during the initial setup process, and enter your network password when prompted by the app.
5. Advanced Zone Profiling: The Secret to Maximum Efficiency
Once your controller is online, avoid the temptation to simply input a basic time-based schedule. To unlock the full water-saving capabilities of your smart timer, you must carefully calibrate the unique characteristics of every individual zone. The controller uses this data to customize its algorithmic watering models.
Soil Type Selection
Different types of soil hold and release water at vastly different rates. Inputting the correct soil type prevents run-off and deep-root starvation. The three primary soil categories are:
| Soil Type | Water Absorption Rate | Water Retention Capacity | Irrigation Strategy Needed |
|---|---|---|---|
| Sand | Extremely High | Very Low | Frequent, short watering cycles to prevent leaching. |
| Loam | Moderate | Balanced | Standard, deep intervals; the ideal agricultural soil. |
| Clay | Extremely Low | Very High | Slow, pulsed cycles to prevent surface pooling and runoff. |
Vegetation Type
A well-manicured Kentucky Bluegrass lawn has vastly different hydration needs than a perennial flower bed or a xeriscaped succulent garden. Specify what is growing in each zone. Lawns generally require deep, consistent watering to build strong roots, whereas established native trees and shrubs prefer deeper, highly infrequent soakings.
Sprinkler Head Typing
The volume of water delivered to a landscape depends entirely on the type of nozzle installed. You must identify the hardware used in each zone:
- Rotary Heads / Rotors: These heads spin slowly, throwing a concentrated stream of water over long distances. They have a low precipitation rate and need to run longer to deposit the same amount of water as other heads.
- Fixed Spray Heads: These emit a continuous fan-shaped pattern over a smaller radius. They deliver water rapidly and can cause runoff if run for extended durations.
- Drip Emitters / Bubblers: These deliver water directly to the base of specific plants at a micro-level, measured in gallons per hour rather than gallons per minute. They are highly efficient but require significantly longer run times.
Sunlight and Slope Exposure
Assess how much direct sunlight each zone receives throughout the day. A zone positioned on the south side of a building under full sun will experience far higher evaporation rates than a north-facing zone shaded by mature trees. Additionally, specify if a zone sits on a steep slope; if so, the controller will automatically break up long watering windows into short, pulsing increments to give the water adequate time to soak into the incline rather than cascading down into the street gutter.
6. Choosing Your Scheduling Strategy
Smart controllers generally offer three distinct modes of operation. Choosing the right one depends on your personal comfort level with automated technology.
Fixed Scheduling
This mode mimics a traditional controller but adds smart weather overrides. You set the specific days and times you want the system to water, and the controller will only step in to skip cycles if rain or freezing weather is actively forecasted. This is an ideal transitionary mode for beginners who want predictable schedules.
Flex Monthly Scheduling
In this hybrid mode, the controller automatically recalculates watering durations and frequencies once a month based on historical climate data for your specific zip code. If July is historically hotter and drier than May, the system will automatically ramp up its run times at the start of the month without requiring user intervention.
Flex Daily Scheduling
This is the pinnacle of smart irrigation technology. In Flex Daily mode, the controller treats your yard like a checking account for water. Every day, it checks the local weather and ET values to subtract water lost to evaporation, while adding any water gained via rainfall. The system calculates the soil moisture balance for every zone and will only trigger a watering cycle when a zone’s moisture level drops below a critical threshold. This approach keeps plants healthy while maximizing water savings.
7. Regular Maintenance and Troubleshooting
While smart sprinkler timers are highly automated, they are not completely maintenance-free. To keep your system running smoothly, perform these occasional checks:
Addressing Connectivity Issues
If your controller loses its connection to your home network, it will temporarily default to a safe, conservative backup schedule stored on its local internal memory. If you notice your app stating the device is offline:
- Check if your home internet router has been moved or rebooted recently.
- Power-cycle the controller by unplugging its transformer from the wall for 30 seconds, then plugging it back in.
- Consider installing a Wi-Fi range extender if your controller is mounted far away on an exterior wall.
Seasonal Adjustments and Winterization
If you live in a geographic region prone to freezing winter temperatures, you must winterize your irrigation system to prevent ice from rupturing your underground pipes and valves. While your smart timer can be configured to “Standby Mode” via the app to pause all automated watering cycles, you must still physically blow out the residual water from your lines using pressurized air before the first hard freeze hits.
Physical System Inspections
No smart algorithm can detect a cracked PVC pipe underground or a sprinkler nozzle that has been crushed by a lawnmower. Periodically use your app’s “Manual Run” or “Remote Control” feature to walk your property while each zone is active. Look for clogged nozzles, misaligned heads spraying fences instead of grass, and bubbling puddles that indicate a subterranean leak.
Conclusion: The Long-Term Return on Investment
Upgrading to a smart sprinkler timer represents a rare win-win scenario for both your wallet and the environment. By substituting precision data for human guesswork, these devices eliminate overwatering, reduce household water consumption by up to 30% to 50%, and drastically improve overall plant health. With intuitive smartphone apps putting complete control of your landscape right at your fingertips, managing your outdoor watering routines has never been easier, cleaner, or more efficient.


